 |
 |
| Monday, 15 December 2014 14:17 |
Links to ProtexRootCA certificates:2018 Certificates: .crt format: http://protex.e2bn.org/certs/2018ProtexRootCA.crt .der format: http://protex.e2bn.org/certs/2018ProtexRootCA.der
You can use this URL - https://protex-ssltest.e2bn.org/ - to check that the certificate has installed correctly. Protex SSL interception
Protex web filtering systems perform content inspection on all untrusted web sites by default. For correct operation on https (SSL) sites all client devices must have the E2BN RootCA certificate installed.
The 2018 certificate (see links above) fixes some issues on later versions of mobile device operating systems. Moving to the new 2018 certificate requires a reconfiguration of your Protex system.
While it is safe to install both the original and 2018 certificates on your clients please contact This e-mail address is being protected from spambots. You need JavaScript enabled to view it for full details and guidance.
Below are instructions for installing the RootCA on a range browsers and operating systems:
Upgrading to the 2018 ProtexRootCA
First, update all your clients by installing the new 2018 E2BN Protex RootCA certificate when convenient. You do not need to remove the previous certificate - clients can have both installed and will negotiate the one to use with the Protex server - so you can update clients over a few days if necessary. Once all clients have the new 2018 certificate please contact This e-mail address is being protected from spambots. You need JavaScript enabled to view it so that we can switch your system over to the new certificate at your convenience.
If you or a local administrator wish to perform the server-side switch yourself, login to Protex web admin and navigate to Setup/SSL Cert. Toggle the option to 2018 certificate. Then navigate to Action Changes, click Apply changes. Once this has been done a Protex Hard restart will be required. You can do this via the Action changes menu or wait for the scheduled night-time restart.
There are links to both the old and new certificates on the Protex server interface (Setup/SSL Cert) and here:
New 2018 ProtexRootCA in .crt format: http://protex.e2bn.org/certs/2018ProtexRootCA.crt
For more information about what you need to do please read these Frequently Asked Questions Installing the E2BN Trusted Root Certificate
Installation via Group Policy (Active Directory) - for IE on Windows Vista 7 and 8
THIS IS THE PREFERRED OPTION: whenever possible use Group Policy to distribute the certificate to every Windows computer on your network as installing on individual computers is time-consuming. In addition, we have now had several issues reported with getting the certificate to install correctly - usually related to local differences in administrative user permissions. Download and the .crt file from http://protex.e2bn.org/certs/ProtexRootCA.crt From http://technet.microsoft.com/en-gb/library/cc738131(v=ws.10).aspx 1. Open the Group Policy object (GPO) that you want to edit. 2. In the console tree, click Trusted Root Certification Authorities here: Policy Object Name/Computer Configuration/Windows Settings/Security Settings/Public Key Policies/Trusted Root Certification Authorities 3. On the Action menu, point to All Tasks, and then click Import. This starts the Certificate Import Wizard, which guides you through the process of importing a root certificate and installing it as a trusted root certification authority (CA) for this GPO. Installation - Standalone Device - Windows 8 single or multiple users - Windows 7 single User
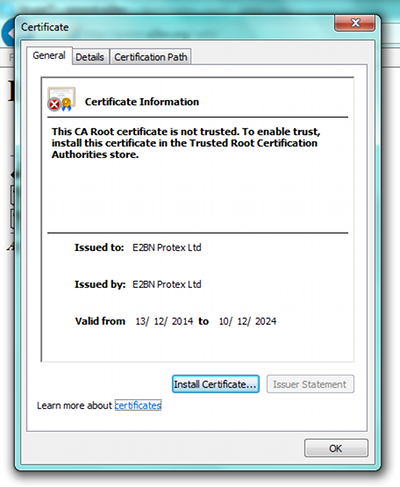
Note: this must be done by a user with Administrative rights - in particular the user must have the right to add a certificate to the Trusted Root Certification Authorities store. Download and the .crt file from http://protex.e2bn.org/certs/ProtexRootCA.crt. This should save it into your documents/or downloads folder. Locate the .cer file in your documents or download folder. Double-Click the file and accept any UAC warnings. You should then be presented with a screen similar to below this:
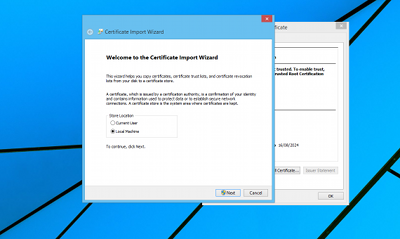
Click on "Install certificate..." and select Local Machine and the store location Trusted Root Certificate Authorities
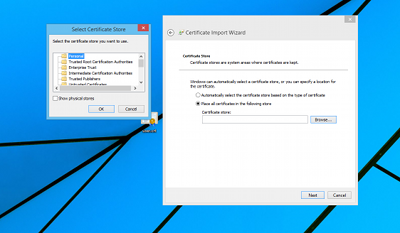
Install the certificate in the Trusted Root Certificate Authorities directory shown in the image below, if you do NOT install the certificate in this directory Protex will NOT function correctly.
Click "Next" and then "Finish" to complete the process.
NOTE on Windows 7. If the Certificate icon has a red cross next to it the installation has failed even though it is reported as being successful. The certificate HAS been imported but is NOT trusted. See this article for possible solutions. Whenever possible it is best to use the Group Policy the distribute the root certificate.
Installation on Windows 7 - Standalone Device with multiple users
To add certificates to the Trusted Root Certification Authorities store for a local computer
Administrators is the minimum group membership required to complete this procedure.
Installation on OSX
Download the .crt certificate file - http://protex.e2bn.org/certs/ProtexRootCA.crt - and save it in a directory you will remember. For example, your desktop.
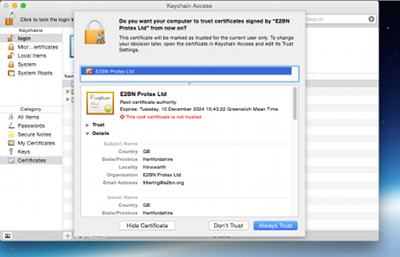
Double click on the certificate and should should get the following screen. Click "Always Trust".
Enter your administrator account password and click on "Update Settings" to install the certificate. The certificate is now installed for this account only. To make it available to all users of this OSX device start the Keychain Access utility (in Applications/Utilities) and copy the certificate from the login chain to the system one. Use "Right-click" when copying and pasting the certificate item and you will also need to enter and the password again to complete the copy.
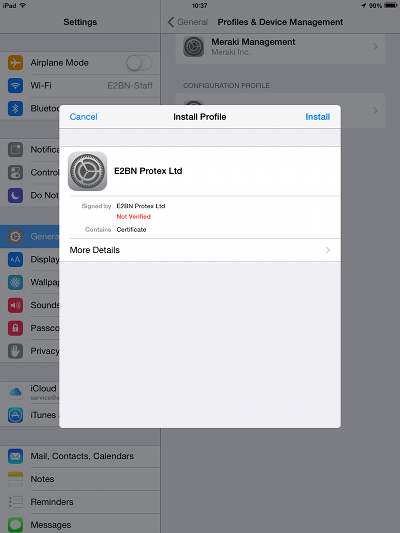
Use Safari Browser to navigate to http://protex.e2bn.org/certs and click the .crt link on this page. The device should prompt the user to install the certificate. Installation can also be done via MDM system such as Apple Configurator - download the file on the management system and then add to the Profile payload Certificates section and deploy to your devices.
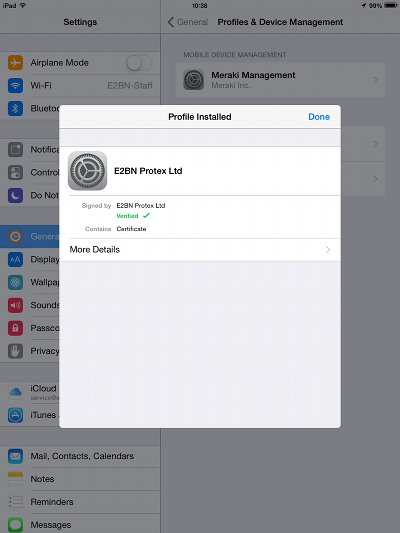
Click "Install" at each point until you come to the screen confirming that the certificate is trusted:
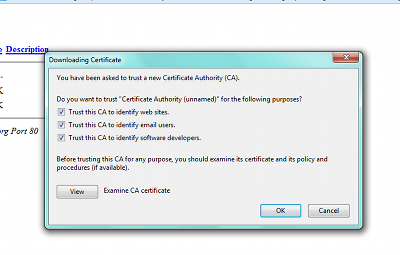
Installation on Firefoxhttp://protex.e2bn.org/certs/ProtexRootCA.crt
Click on the link above and you should be presented with the screen below.
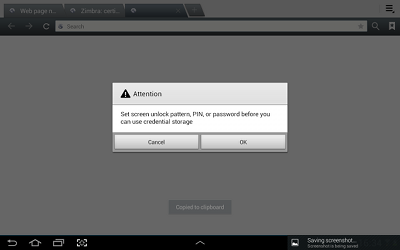
Tick all three boxes on the next screen and click OK Installation on Android
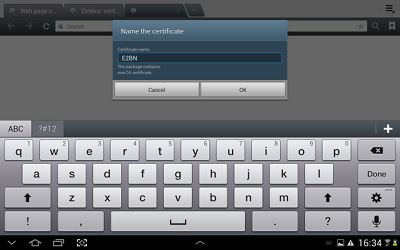
Download and the .crt file from http://protex.e2bn.org/certs/ProtexRootCA.crt. Open the certificate and name it.
Click Next. On android devices you must set a password before you can install any certificates but you may remove the password after the processe has been completed.
Press "OK". Then enter a password and press "Done". You should then have a message on screen saying that the certificate has been installed.
Installation on Chromebooks
Download and the .crt file from http://protex.e2bn.org/certs/ProtexRootCA.crt and save it to a convenient location. Follow the instructions here on setting up your Chromebook for SSL interception and installing the certificate. |
Protex®, E2B® and E2BN® are registered trade marks and trading names of East of England Broadband Network (Company Registration No. 04649057)