Protex Server Configuration
Initial Setup
Once the server has been installed (see here) it will be working in basic port based mode:
- the Appliansys cache port (800) will no longer be available
- port 8084 will give access via the STAFF filter profile
- port 8080 will give access via one of the student profiles - exactly which one will depend on your school type.
For some users this will be all that is required. But if, for example, you want to use NTLM authentication then further configuration is necessary. This page will outline the various configuration options listed on this menu and link to more detailed information.
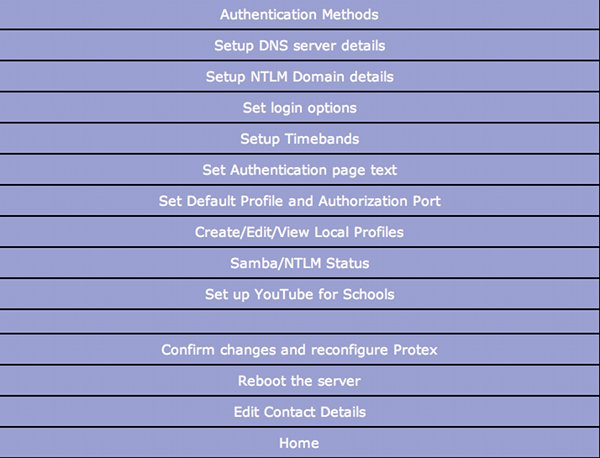
Authentication Methods
Three methods of deciding which filter profile to use are currently implemented.
- Port based
- Location Based
- NTLM/Active Directory based
Note that these three mechanisms are not mutually exclusive: it is perfectly possible for all three methods to be used at the same time. For example, port 8080 can be left as the default for NTLM authentication while each of 8081-8084 are used for Port based authentication and particular computers are asigned profiles basd on their IP address. The actual profile assigned to a user will then depend on the port their browser is assigned (perhaps via a Group Policy in the AD) and which computer they are using.
DNS Settings
List the DNS servers the filtering system is to use. In most cases these should be the Local Authority, RBC, or ISP managed DNS servers. In some cases DNS servers on the local network may be used but as the vast majority (and in most cases all) of the traffic being filtered will be outside your own network there is a performance penalty for using a local DNS server: it is more efficient and robust to use external DNS. In some rare cases you may not have access to any DNS servers: if this is the case you may select the Go direct to the internet option. When this is selected DNS lookups will go direct to the "root" servers. This is, however, the least efficient method and may incur a performance penalty.
NTLM Settings
Settings required for connecting the Protex server to the local Active Directory domain.
Login Options
Set whether to use Popups or not, set a "Home Page" if required and code for direct login options.
Timeband Settings
Use this dialog box to set up the timebands you want to use to modify the default profile a user receives depending upon the time of day - for example, to allow Games at luchtime only.
Authentication Page
Set up various aspects of an Acceptable Use Policy. A default policy is provided but can be edited or replaced for local use if required. Also provides options for automatic re-login and whether to use a popup window or not.
Default Profile and Main port
By default the port used for Authentication is 8080 - the same as the Student profile when used in Port based mode. This dialog box allows this to be changed and a new default filter profile to be defined.
The default profile is used whenever a user is in an AD group which has not had a filter profile specifically assignd to it.
We recommend that the Main port is not the same as one of the ports used for port-based profiles as results may appear unpredictable and it is less confusing if they are distinct.
So, for example, the four standard profiles may be assigned to ports 8081-8084 while NTLM authentication is assigned port 8080. In this case all users connecting on ports 8081-8084 receive the assigned profile. Those connecting on port 8080 will be required to authenticate themselves and either get the profile assigned to their user group or, if no assignement has been made, the default profile.
Create/Edit/View Local Profiles
You can use this dialog both the view the active URL categories, file and MIME types bloced on particular profiles. More importantly it can be used to create a local profile based one of the standard Protex ones which you can then edit. You may, for example, make a copy of the Secondary profile and make changes to the file extensions which are blocked so allowing more or fewer file types to be downloaded from non-trusted sites.
Samba/NTLM Status
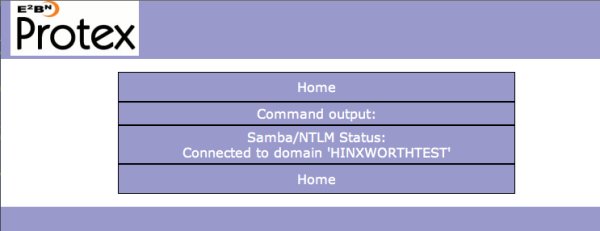
Test whether the server is currently connected to the local AD domain.
Set up YouTube for Schools
Once you have set up a YouTube for Schools account you use this menu item to enter your unique ID into the Protex filtering system. By default this code is the applied to every YouTube request on all the student profiles so that they can access educational YouTube videos. Staff can, by default, access the whole of YouTube and this is unaffected by adding the YouTube for Schools ID. There is more information about YouTube for Schools on their website and some FAQs.
If you do not want some or all of your students to access YouTube for Schools then you can do this via the local profiles. First create local profiles for those students that you do not want to access YouTube for Schools, then modify the profiles to turn off access to YouTube for Schools. (see Create/Edit/View Local Profiles for details on how to create and edit local profiles).
Confirm Changes & Reconfigure
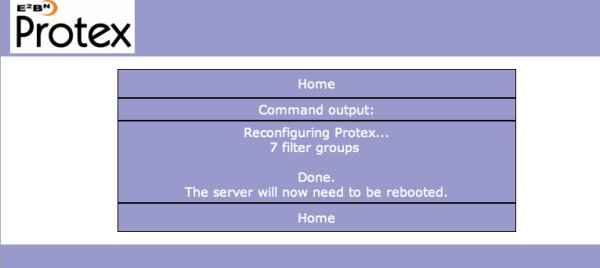
Click to activate any changes made to the server's configuration. Until this menu command is run any changes made are not incorprated into the live Protex configuration files. This command generates a completely new set of files which will be invoked when Protex is next restarted. In many cases the server will not need a full reboot but Protex will need to be restarted from the Restart Protex item on the Advanced menu.
Reboot the Server
Reboots the server - may be required after some major configuration changes.
Edit Contact Details
Make changes to the contact details held on the server - these details are uploaded to the central management system so can be used to send system administrators advance warning of major changes, new features, etc.
